Scientific Writing & Digital Tools#
Goals#
Learn how to write/structure a paper
Learn how to best work with Google Docs & Overleaf
Learn about digital tools for better/more prodcutive writing
Writing a scientific paper#
Writing a scientific paper can be a challenging task, but with a well-structured approach and a few helpful tips, it can be a rewarding experience. A scientific paper is a formal way to communicate your research findings to the scientific community and is an essential part of the scientific process.
Structure#
The following is a typical structure for a scientific paper:
1. Abstract:
A summary of the hypothesis, design, and findings. The PR section. (~200 words)
2. Introduction:
Establish a state of knowledge
summarize previous findings,
bridge the gap between existing knowledge and current questions,
state the research question clearly and explain why it is important
clearly state any specific hypothesis
3. Methods:
Describe the methods and procedures used in the experiment, including any equipment and materials used.
E.g., recruitment, inclusion/exclusion criteria, measures, hardware, procedure, design, analysis pipeline.
be detailed enough that someone else could reproduce the experiment
4. Results:
Present your findings, including any data and statistical analyses.
start with descriptive and follow with inferential statistics
Include tables, figures, and graphs to help illustrate the results
5. Discussion:
Summarize the main findings and their significance
Verdict on the hypothesis
Interpret the results and discuss their implications in the context of previous research and study limitations (validity, measurement error, design weaknesses),
recommendations and avenues for future research
6. References:
List the sources cited in the paper in a consistent format (e.g., APA, MLA).
Tips for Junior Scientists:
Be concise and to the point. Avoid unnecessary words/phrases.
Use clear and simple language. Avoid technical phrases unless necessary
Be thorough and accurate in reporting your results. Include all relevant data and any limitations (it is better to cut later than to have to redo the work because you missed important implications)
Support your claims and conclusions with references as much as possible -> if you state a fact, you gotta have the receipts
Review and revise your work several times before submitting it. Pay attention to grammar, spelling, and formatting.
10 rules on structuring your paper#
Writing a good paper takes time and practice. We’ll walk thorugh a paper by Mensh & Kording (2017) providing rules for scientific writing. These rules aim to introduce a frame of reference on how to get started with scientific writing, continuously improve, and avoid mistakes and frustrations.

We’ll go over general principles regarding writing for an audience (rules 1 - 4), the different components of a paper and what they are each trying to communicate (rules 5 - 8), and lastly, some considerations for the writing process itself (rules 9 - 10).
The images below provide a short summary of the ten rules we’ll discuss and how violations of these rules might manifest. It’s a good idea to check back once you’ve read the rest of the chapter to evaluate your understanding, but it can be further used as a checklist for good writing in your future endeavors.
Summary of the ten rules and how to tell if they are being violated;#
Table 1. Mensh & Kording (2017); doi.org/10.1371/journal.pcbi.1005830
Principles (Rules 1–4)#
In the following section, we’ll introduce general writing principles to optimize the reader’s experience and effectively communicate the aims of our work.
1. Focus your paper on a central contribution, which you communicate in the title#
A paper ideally aims to provide a single contribution; multiple contributions tend to be less convincing and, therefore, less memorable. The title is a crucial part here, as it’s the first element a reader encounters and determines if people will read even the abstract. Focus on a single message transmitted by the title, but don’t over-sell.
2. Write for flesh-and-blood human beings who do not know your work#
You, as the writer, will be the expert on your work, but we’ll have to assume that readers may possibly be naive to the work or field. Therefore, we need to consider the following:
- quality and how clear your writing is can be nearly impossible to judge work from the perspective of the naive reader

- an approach from the perspective of a naive reader means to make clear "why do you need to understand/care about this problem" and how the paper answers the problem/question (ideally understandable with minimal effort).

- define technical terms and avoid abbreviations/acronyms
    - adapt to the working memory constraints of humans
    - 2-3 abbreviations in total, write out the first time with the abbreviation in ()
    - avoid using different words for the same concept/thing -> confuses the reader
3. Stick to the context-content-conclusion (C-C-C) scheme#
Scientific papers benefit from being written in a classical story structure with a discernible beginning, a well-defined body, and a conclusive end. Therefore, we make use of the context-content-conclusion (C-C-C) scheme.
The C-C-C scheme defines the structure of the paper on multiple scales:
for the whole paper:
    - introduction = context
    - methods/results = body
    - discussion =  conclusion
for each paragraph:
    - first sentence = defines the topic or context
    - body = novel content put forth for the reader’s consideration
    - last sentence = provides the conclusion to be remembered
The C-C-C scheme produces texts aimed at more patient readers who take their time to engage and interact with a text.
It’s best to generally avoid writing for impatient readers. We’ll have to rely on the title and abstract for this, but these can be caught by presenting the most exciting content first while necessarily following up with important context to remain credible.
4. Optimize your logical flow by avoiding zig-zag and using parallelism#
Avoid zig-zag through your story:
- only the central idea should be touched upon multiple times
- minimize the number of subject changes
- string related paragraphs together without interruptions by unrelated materials
Instead, make use of parallelism to provide structure.
- parallel messages -> parallel form -> easier for reader
- communicate different points of an overarching topic using the same syntax

    -e.g.
    Introduction:
        Hypothesis 1
        Hypothesis 2
        Hypothesis 3

    Methods:
        Analysis 1 -> Hypothesis 1
        Analysis 2 -> Hypothesis 2
        Analysis 3 -> Hypothesis 3

    Conclusion:
        conclusion 1 -> Hypothesis 1
        conclusion 2 -> Hypothesis 2
        conclusion 3 -> Hypothesis 3
The components of a paper (Rules 5–8)#
Components (Abstract, introduction, etc.) have different objectives; therefore, the specifics of their C-C-C structure necessarily differ. The following will discuss the specifics of these differences.
5. Tell a complete story in the abstract#
Quite often, the abstract is the only part that will be read; therefore, it must efficiently convey the entire message of the paper.

The C-C-C-scheme is again highly conserved in the abstract
- context = First sentence
    - introducing the broader field and the specific research question of study,
    - distinguish given paper from current state-of-the-art -> the specific gap
    - why does it matter -> connection between the specific gap and the broader context

- content:
    - describe the method/approach used to fill the gap
    - executive summary of results

- conclusion: Last sentence
    - interpret results to answer question(s) posed in context
    - how do results impact the broader field -> “broader significance”
6. Communicate why the paper matters in the introduction#
This section flows from a broad introduction to the specific problem(s), highlighting a gap in knowledge/methods and why this gap is important, to progressively more specific paragraphs to reach a clear exposition of what is missing and, in subsequent paragraphs, how the paper aims to address the problem.
Work from a
    - field gap: e.g., language processing
    - subfield gap: speech processing
    - gap within the subfield that you will fill: influence of speech rhythm on neural rhythms
Each introduction paragraph should further develop the gap from context to content to conclusion.
    - context = orient the reader
    - content = outline the “knowns”
    - conclusion = critical “unknown”
Further, make sure to include clues related to the gaps that lead into or prime reader for your hypothesis and method sections.
7. Deliver the results as a sequence of statements, supported by figures, that connect logically to support the central contribution#
Aim to convince the reader that the claims in the abstract and the following conclusion are supported by data and logic.
The first paragraph summarizes the overall approach used to address the problem outlined in the introduction and sketches out the logical structure of how the results support the claims.
Ideally, these are converted into a sequence of declarative statements on the highlighted gap in knowledge/methods and why the researchers are addressing them in a clear progression of logical steps. These statements can then be used as the names of the headers of subsections and titles of figures in the following paragraphs.
All subsequent paragraphs should follow the structure of:
- context = setup questions paragraph answers
- content: data/logic
- conclusion: answer the question
In this section, figures, tables, and titles are particularly important, as these are the most “objective support” towards claims. They should be highlighted as such and be clear, concise, and readable.
8. Discuss how the gap was filled, the limitations of the interpretation, and the relevance to the field#
The discussion aims to explain how the results have filled the gap identified in the introduction, provide caveats to our interpretations, and describe how the findings advance the field. Overall, provide a step-by-step outline to put the conclusions of the paper into context.
The structure should roughly follow:
First paragraph:
- general summary of findings (from results section)
Second to penultimate paragraph:
    - describe the area of weakness or strength linking to relevant literature
    - perceive contributions/discuss future directions to extend it
    - how can literature alleviate concerns or future experiments address them
Last paragraph:
- description of how paper moves field forwards
Process (Rules 9 and 10)#
Let’s introduce some helpful processes and habits to maximize impact and minimize investing time into less important aspects of the writing process.
9. Allocate time where it matters: Title, abstract, figures, and outlining#
It’s paramount to emphasize the central logic that underlies the scientific claim, the main message of the paper. Reflections on the logic behind the paper connect the experimental phase with the paper-writing phase.
You should aim to:
allocate time based on presumptive importance.
- title, abstract, figures vs. rest/methods (not ideal but unfortunately the default for most readers)
plan before producing
- make an outline
- informal sentence for each planned paragraph
- (potentially) start the process around the description of each result
- each paragraph has a defined role ideally defined at the outline stage
Figures and tables take time to be designed and implemented well.
So before investing time, consider the following:
Figures |
Tables |
|---|---|
1. Is the figure necessary? |
1. Is the table necessary? |
2. Is the figure simple, clean, and free of extraneous detail? |
2. Is the entire table single- or double-spaced (including the title, headings, and notes)? |
3. Is the data plotted accurately? |
3. Is the title brief but explanatory? |
4. Are all axes named correctly? |
4. Does every column have a column heading? |
5. Are parallel figures or equally important figures prepared according to the same scale? |
5. Are all abbreviations and special symbols explained? |
6. Are all abbreviations and special symbols explained? |
6. Is the table referred to in the text? |
7. Is the figure referred to in the text? |
10. Get feedback to reduce, reuse, and recycle the story#
Writing can be seen as an optimization problem, meaning, quite often, multiple iterations are necessary. Accept that this is ok and usually what we want as:
- some or all aspects can be continuously improved
- rewriting is often faster than cumbersome editing
It’s important to always check if further work is necessary to find violations of good writing; you can use the table at the beginning of this section as a checklist for this purpose.
Writing is further not something that is done in isolation; it is essential to ask for input/feedback from multiple people:
- different test readers (differing in expertise etc.)
- reviewers (i.e., your P.I., etc.)
Digital tools for writing scientific papers#
Now, most people reading this will be familiar with writing tools such as Word or Google Docs and their basic functionality, but there are a lot of add-ons and writing aids out there to improve productivity and writing quality.
In the following, we’ll give some examples of how to add tools to Google Docs, as we’re trying to avoid paid services such as Word.
Google Docs is a free, web-based word processing program that allows users to create and edit text documents, spreadsheets, and presentations in real time from anywhere with an internet connection. It is part of the Google Workspace suite of productivity tools and is widely used for collaborative work among teams and organizations. In this chapter, we will discuss how to use Google Docs, its benefits for collaborative work, and some of its key features.
Getting Started with Google Docs#
Most of you should already have a Google account, e.g., if you’re using Gmail or YouTube. Otherwise, you can sign up here.
Once you have signed in, you will be forwarded to your Google mail account. Now click on the button consisting of 9 points in the upper right-hand corner and select “drive.

Google Drive is an online storage server; its file and directory structure is equivalent to what you’d encounter on your local machine. Click on the “new” button on the top left and select “Google Docs” to create a new document.

You can also upload existing documents from your computer or import them by selecting “upload file.”
Why use Google Docs?#
The key features Google Docs offers are collaborative editing, an integrated version history, and a number of templates and add-ons.
Key Features of Google Docs:
Collaborative Editing: Google Docs allows multiple users to edit the same document in real-time, making it easy for teams to work together on a project. You can invite people to view, comment, or edit a document and see who is making changes in real time. It also makes it easier to keep track of contributions, as you can suggest edits instead of simply rewriting or adding text to others’ documents.
Version History: Google Docs keeps a record of all changes made to a document, so you can easily go back and view previous versions. You can also compare different versions of a document side by side.
Templates: Google Docs includes a variety of templates for different types of documents, such as resumes, letters, and reports. You can use these templates to quickly create professional-looking documents with a consistent look and feel.
Add-ons: Google Docs has a large library of add-ons that can be installed to add extra functionality to your documents. For example, you can install an add-on to add a table of contents or another to create charts and graphs.
This leads to increased accessibility of your work, increased productivity, and improved communication.
Accessibility: Google Docs is accessible from anywhere with an internet connection, making it easy for team members to work together from different locations.
Increased Productivity: Google Docs’ version history and commenting system make it easier for teams to keep track of changes, provide feedback, and make decisions. Add-ons and templates can further help you spend less time on editing, etc., leading to increased productivity.
Improved Communication: Google Docs’ commenting system allows team members to communicate directly within a document, improving the flow of communication and reducing the need for separate email exchanges.
Add-Ons for Google Docs:#
Save some time and sanity by implementing the following tools into your workflow!
Adding new extensions to Google Docs is trivial; simply click on Extensions -> Add ons -> Get add-ons and use the search bar to find new add-ons. Alternatively, some tools offer browser-based solutions; simply follow the installation tutorials provided in the following selection of examples.
Grammar, Spelling, formatting, as well as phrasing:
Productivity/Motivation:
Revisions/Text-to-speech:
Managing References/Citations:
There are plenty of digital tools to manage citations and references; every academic project you’re starting should have its own maintained project library. For more info on how to use citation software and manage your library, check out the chapter on Project design. Commonly, you’ll be asked to follow a specific citation and referencing style, e.g., the American Psychological Association (APA) 7. th Ed.. Most citation software tools automatically style your in-line citations and references according to your needs.
To make sure you’re not accidentally copying others’ work, you can use a plagiarism checker, such as Scribbr.
Beyond docs: Formatting, LaTEX, and Overleaf?#
Sometimes, it becomes necessary to have complete control over the look of a document; sometimes, certain journals will ask to provide manuscripts via a .tex file.
Both involve knowledge of LaTeX (pronounced “Lah-tech”).
LaTeX is a powerful and flexible typesetting language that allows users to have complete control over the format of a document. Unlike traditional word processors, which can often be limiting in terms of formatting options, LaTeX provides the ability to create beautiful and professional-looking documents with ease. This is particularly useful for academic papers, where formatting requirements can be strict and complex. However, LaTeX is not just limited to academic papers; it can also be used to create CVs, resumes, and other types of documents.
LaTeX is, at times, still the preferred tool for many publishers and academic institutions. Additionally, because LaTeX allows for such fine-grained control over formatting, it can help to ensure that papers meet specific style requirements for different publications.
However, learning LaTeX from the ground up can be time-consuming and challenging, which is why platforms like Overleaf are becoming increasingly popular.
Overleaf#
Overleaf is a powerful collaborative platform designed to simplify the process of creating and sharing academic documents. It offers a range of tools and features that make it easy for individuals and teams to write, edit, and collaborate on documents in real time. With Overleaf, you can focus on the content of your document while the platform takes care of formatting and layout.
One of the main benefits of Overleaf is its ability to streamline the writing process, allowing you to work more efficiently and effectively. The platform offers a wide range of templates and tools that help you create high-quality documents quickly and easily. There are templates available for a wide range of document types, including academic papers, CVs, and resumes, as well as a variety of styles and formats to choose from.
Additionally, Overleaf provides a range of collaboration tools that allow users to work together on a document in real-time, making it easy to share feedback and ideas and provides a secure and reliable platform for sharing and publishing your work. With built-in version control and easy integration with a range of popular publishing platforms, you can be confident that your work is safe and accessible to others.
In summary, Overleaf is an excellent platform for academics and researchers looking to streamline their writing process, collaborate with others, and share their work with a wider audience.
Working with Overleaf#
To get started with Overleaf, it’s best to find a template via the template library.
Pick a field, follow a specific template, and click on the open as template button.
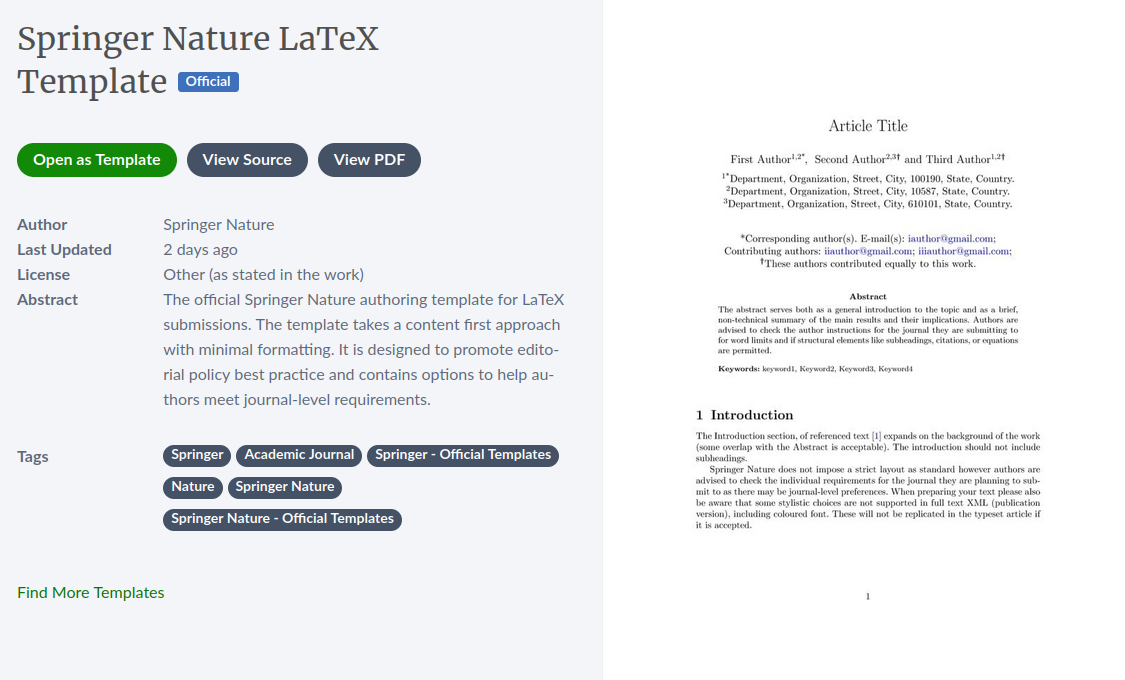
This will open the template as an editable document. You’ll see the rendered or “compiled” version of the document on the right-hand side; this is how your final pdf would look like. On the left-hand side, you see a view of all the files that would make up the final document; simply click on them to show their content. Some templates, like the one depicted here, already come with user guides that you can simply follow to adapt a template to your needs.
The main content of a document on Overleaf is contained in .tex files. These LaTeX files contain both the text content you’ll see in the rendered view and the LaTeX code specifying how the text should be displayed.
LaTex code will be displayed in green, and the text it modifies is included in curly braces {} behind. For example, the \section{Introduction} declares that we’d like to start a new section with the title "Introduction".

In most cases, it will only be necessary to change the actual text components of a template. Simply change some of the content and click the green recompile button to preview your changes. If you’re done modifying a template, simply use the download button right next to the recompile button to export your document as a PDF file.

Overleaf provides further functionalities such as version history, allowing you to revert to an earlier version of the document, for example. You can also invite others to collaborate or chat about a document via the
share option.

If you want to go more in-depth and write your own LaTeX documents or change the look/structure of a template, there are great resources out there to help you with that:
Video Guide: How to Use Overleaf and Latex (In-depth introduction)
Introdcutory tutorial: Learn LaTeX in 30 minutes
Video Guide: LaTeX for Beginners
Template. A quick guide to LaTeX (A good starting point to copy all the most important LaTeX commands for your documents)
And you can, of course integrate other browser extensions like Grammarly into Overleaf:
References#
Mensh, B., & Kording, K. (2017). Ten simple rules for structuring papers. PLOS Computational Biology, 13(9), e1005619.
Achknowledgments#
Felix Körber
Michael Ernst
Phd student - Fiebach Lab, Neurocognitive Psychology at Goethe-University Frankfurt
Peer Herholz (he/him)
Research affiliate - NeuroDataScience lab at MNI/MIT
Member - BIDS, ReproNim, Brainhack, Neuromod, OHBM SEA-SIG, UNIQUE