Hosting Your Course Website#
Now that you have created your own course repo based on the course template, you will learn how to actually turn your course files into a website. To do this, we’ll be using Github Pages. GitHub Pages allows users to host websites directly from their GitHub repos, creating a website for their personal portfolio, project documentation, or, in this case, course content.
The website is generated directly from the contents of your GitHub repo and is automatically updated whenever changes are made to the repository.
Goals#
This chapter aims to include the following goals:
Learn how to host a website using GitHub pages
Learn some common error warnings and how to troubleshoot them
Setting up GitHub Pages#
Normally, you’d have to set up a “GitHub-pages-actions” script for the website to be automatically built on push, but the course template already contains everything you need.
Please take a closer look at the .github/workflows folder, where you’ll find a file called book.yml. This file already contains all the instructions necessary for GitHub to build your book automatically. All you need to do now is change a few of the settings of your online repo.
Setting Up Your Website#
Open your repository in your browser and click on “Settings” in the top tab, located on the far right.

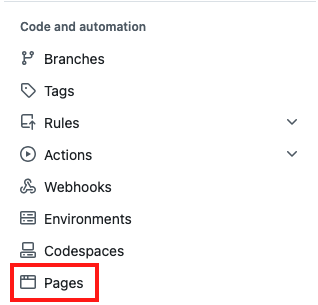
Click on “Pages” under “Code and automation” on the left side.
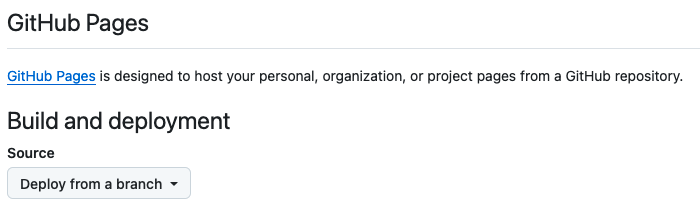
Under Source, select “Deploy from a branch”.
Under Branch: Select branch “main” and select the “/root” folder and save.

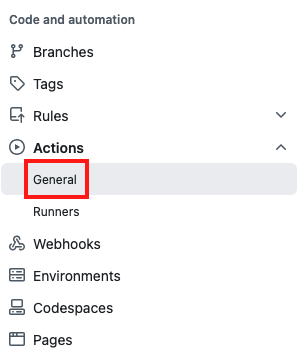
Click on “Action” and then “General” under “Code and automation”.
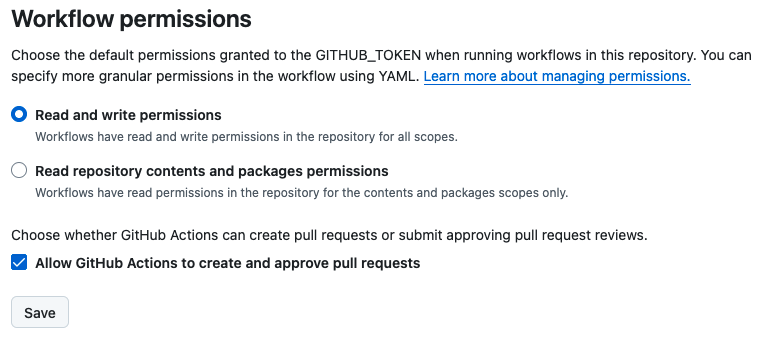
At the bottom of the page, under “Workflow permissions,” select the option “Read and write permissions” and allow Github Actions to create and approve pull requests. Then, click on save.
Push a new commit to your repo, i.e. make a change to one file (e.g., add a line to your
README.md).
Checking Your Workflow#
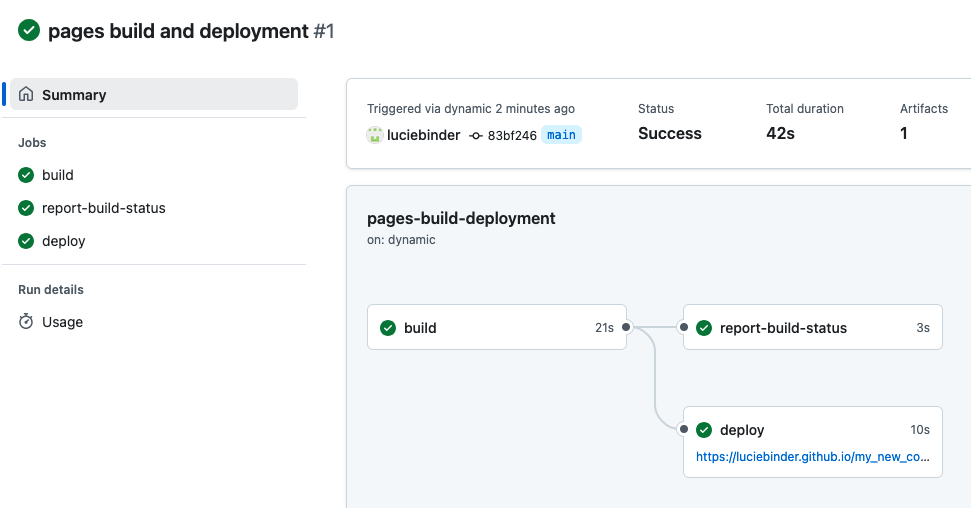
Next, click on “Actions” at the top of your repository. You should see a workflow named “pages build and deployment” running. By clicking on this workflow, you’ll be able to view a summary of the process. In the image below, the process is complete, as shown by the green checkmark:
Getting Your Link#
Once that process has been completed head back over to “Settings” -> “Pages”. At the top, under “GitHub Pages”, you should now find a field that looks like this:
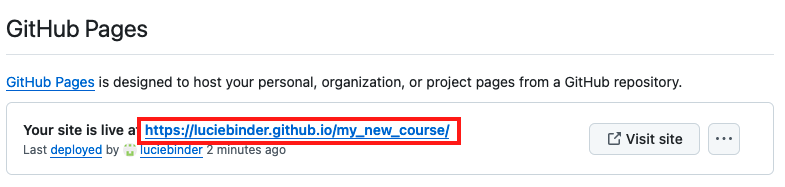
Click on the link to view your freshly built content website!
Important: There’s one final setting you need to adjust: On the same page, where you found the link, select “gh-pages” (instead of “main”) as the branch and save your changes.

That’s it! Congratulations to your first course website!
Next Section:#
In the next section, you will learn how to identify failed workflows and how to troubleshoot common errors.